How to Build DIY Floating Shelves for Small Spaces (Step-by-Step)
💡 Affiliate Disclosure: PetchCrea is reader-supported. When you buy through links on our site, we may earn an affiliate commission at no additional cost to you. As an Amazon Associate, I earn from qualifying purchases. We only recommend products that genuinely help you optimize and organize your space.
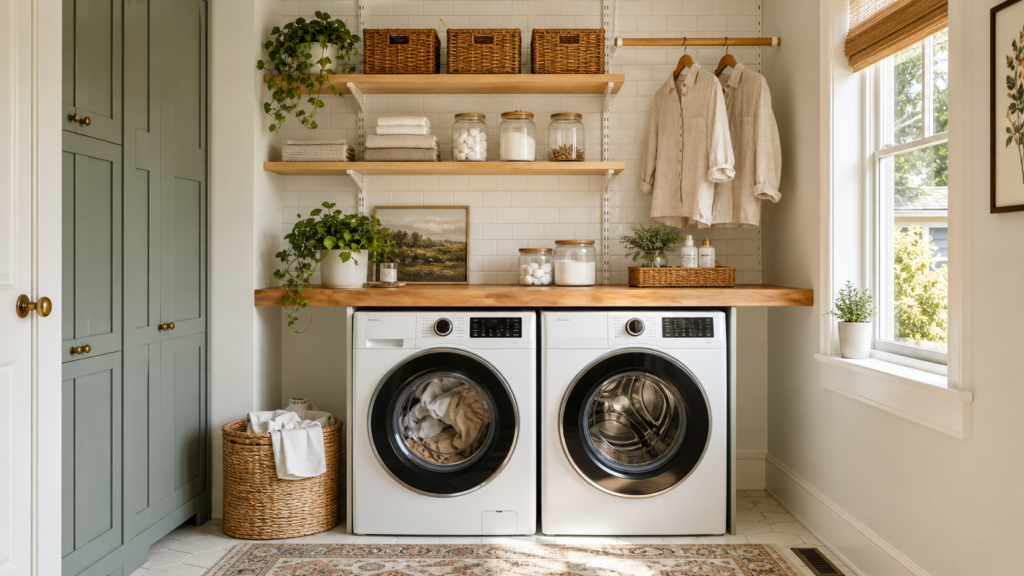
When floor space is at a premium in a small home, laundry room, or closet, vertical wall space is your most valuable asset. Floating shelves offer a clean, open, and stylish way to store heavy items like detergent jugs, folded towels, and storage baskets without the bulky footprint of traditional floor cabinets.
However, the biggest concern most homeowners have with DIY floating shelves is strength: Will they sag under weight? Will humidity warp the wood?
The secret to building rock-solid floating shelves that can hold heavy cleaning supplies is simple: anchor solid wooden ledger cleats directly into your wall studs using 3-inch framing screws, assemble the shelf using pocket-hole joinery, and seal every side of the wood against moisture.
In this guide, you will learn the exact tools, measurements, step-by-step construction sequence, and water-resistant finishing techniques needed to build professional-grade floating shelves for any tight space.
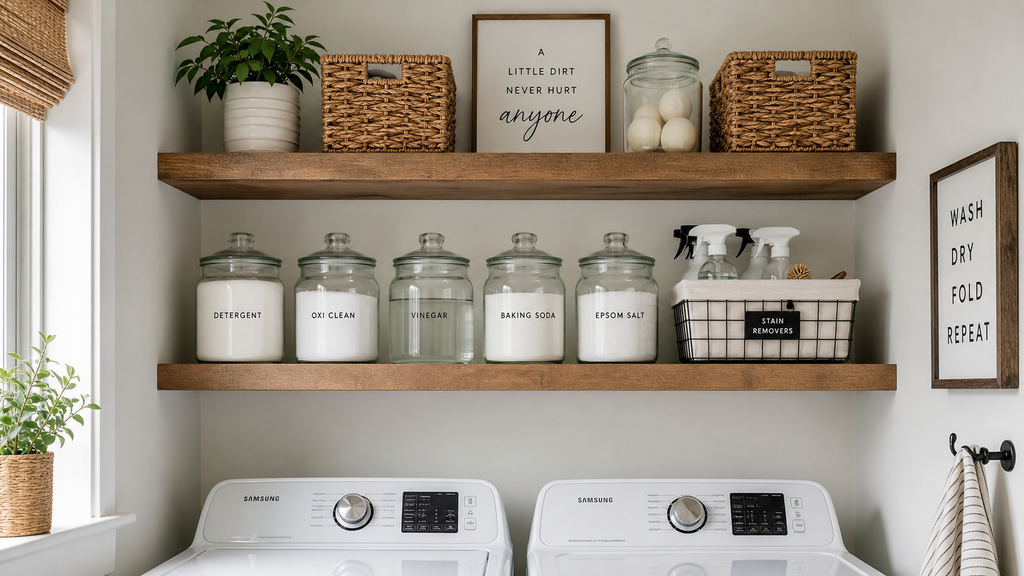
Step 1: Planning Dimensions & Clearances for DIY Floating Shelves
Before cutting any wood, mapping out your shelf height, depth, and vertical spacing ensures your new shelves are comfortable to reach and won’t bump your head or block machine lids.
- Upper Shelf Depth: Keep upper floating shelves between 12 and 15 inches deep. This provides ample space for large detergent bottles and storage baskets without projecting too far into your walkway.
- Vertical Shelf Spacing: Space shelves 12 to 18 inches apart vertically. This allows enough clearance for tall spray bottles, cereal-box-style soap packages, and stackable storage bins.
- Height Clearance Above Appliances: If mounting shelves above a top-loading washing machine, ensure the bottom shelf sits high enough for the washer lid to open fully without hitting the wood. For front-loaders or folding counters, mount the lowest shelf 18 to 24 inches above the counter surface.
Step 2: Gathering Tools & Materials for DIY Floating Shelves
Building custom floating shelves does not require an advanced woodworking shop. Using accessible materials like maple plywood or butcher block slabs paired with a pocket-hole jig yields professional results.
Essential Tools
- Stud Finder & Bubble Level: Crucial for locating wall studs and ensuring perfect alignment.
- Miter Saw or Circular Saw: Equipped with a fine-finish blade for crisp, straight cuts.
- Power Drill & Pocket-Hole Jig: (Such as a Kreg Jig) for creating hidden, high-strength screw joints.
- Orbital Sander: For smoothing wood surfaces prior to painting or staining.
- Household Iron & Utility Knife: Needed if using iron-on wood veneer edge banding.
Required Materials
- Shelf Top & Bottom: 3/4-inch maple or birch plywood (or solid 1.5-inch butcher block / 2×12 lumber).
- Internal Support Frame & Ledger Cleats: 1×2 or 2×4 solid wood boards.
- Fasteners: 3-inch heavy-duty wood screws (for wall studs) and 1-1/4-inch pocket-hole screws (for frame assembly).
- Wood Glue & Wood Filler: To reinforce joints and fill nail holes.
- Iron-On Wood Veneer Edge Banding: To cover raw, exposed plywood edges.
- Moisture-Resistant Primer & Finish: Water-resistant paint or polycrylic clear coat.

- Craftsman Tools: The Kreg Pocket-Hole Jig is ideal for versatile DIY wood projects with materials from 1/2″ to 1 1/2″ th…
- GripMaxx Technology: This woodworking tool has an anti-slip clamping surface that holds material in place for worry-free…
- VersaGrip Rotating Handle: Our carpenter tool also features 360 degree adaptability, allowing seamless use with various …
Step 3: Step-by-Step Guide to Building DIY Floating Shelves
When supporting heavy detergent jugs or stacked linen baskets, floating shelf frameworks must adhere to strict home wall-anchoring safety standards by anchoring ledger cleats directly into structural wall studs using 3-inch cabinet screws.
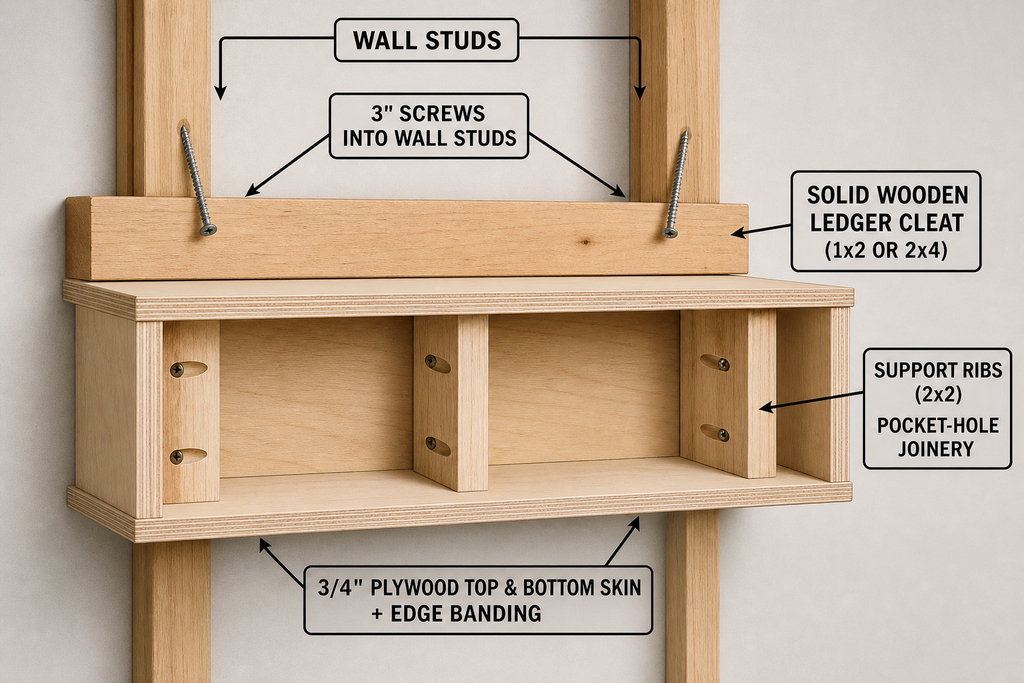
1. Locate Studs & Mount the Rear Ledger Cleat
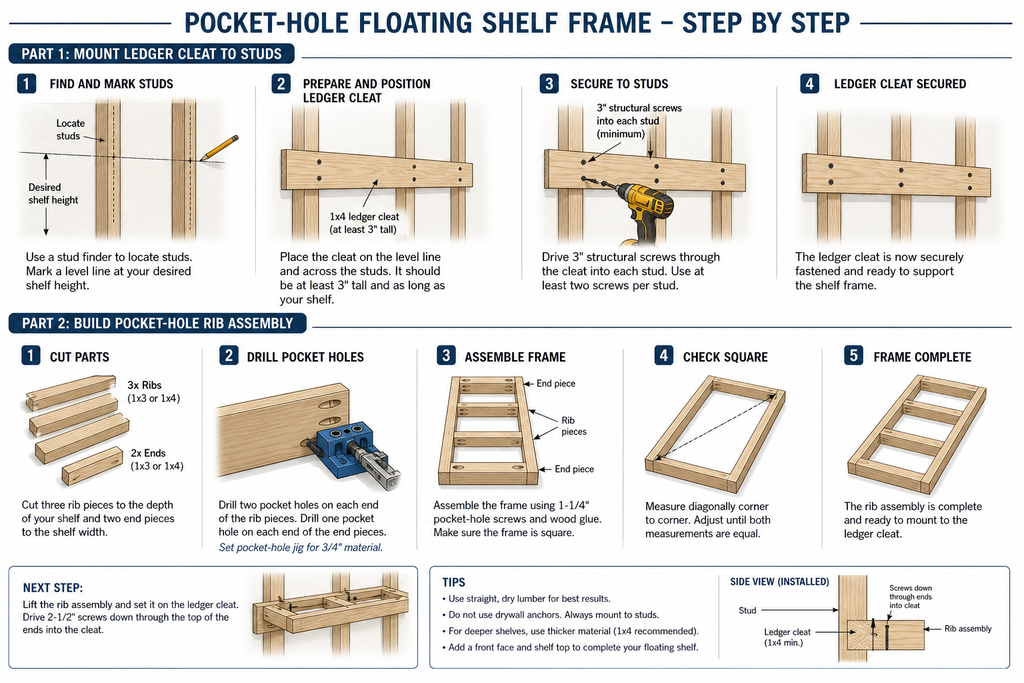
Use a stud finder to locate and mark all wall studs across the installation area. Cut a solid 1×2 or 2×4 ledger cleat to your desired shelf width. Hold the cleat level against the wall and secure it directly into every wall stud using 3-inch wood screws. This ledger forms the structural spine that carries the load.
2. Assemble the Internal Support Box
Build a ladder-style internal frame by attaching perpendicular 2×2 support ribs (spaced 12 to 16 inches apart) to the main ledger cleat using pocket-hole screws and wood glue. Set your pocket-hole jig to match the 3/4-inch or 1.5-inch wood thickness to prevent wood splitting.
3. Attach the Plywood Skins
Cut your 3/4-inch plywood top and bottom panels to match the frame dimensions. Apply wood glue along the top of the internal support ribs, position the plywood panel, and secure it with brad nails or countersunk wood screws.
4. Apply Edge Banding for a Seamless Finish
Raw plywood edges look unfinished and absorb moisture easily. Align iron-on real wood veneer edge banding over the front and side edges. Run a hot iron (wrapped in aluminum foil to protect the iron) along the strip to melt the adhesive. Once cool, trim the excess overhang flush using a sharp utility knife or edge trimmer, then sand smooth.
Step 4: Moisture-Proofing & Finishing Your DIY Floating Shelves
Laundry rooms, small bathrooms, and utility closets experience temperature swings and high humidity. Unsealed wood will absorb airborne moisture, causing swelling, warping, and mold growth over time.
- For a Painted Finish: Apply a dedicated moisture-sealing primer (such as Zinsser Bullseye 1-2-3) to block humidity. Follow with two or three coats of durable interior enamel paint (such as Benjamin Moore Advance). Sand lightly with fine 320-grit sandpaper between coats for a factory-smooth surface.
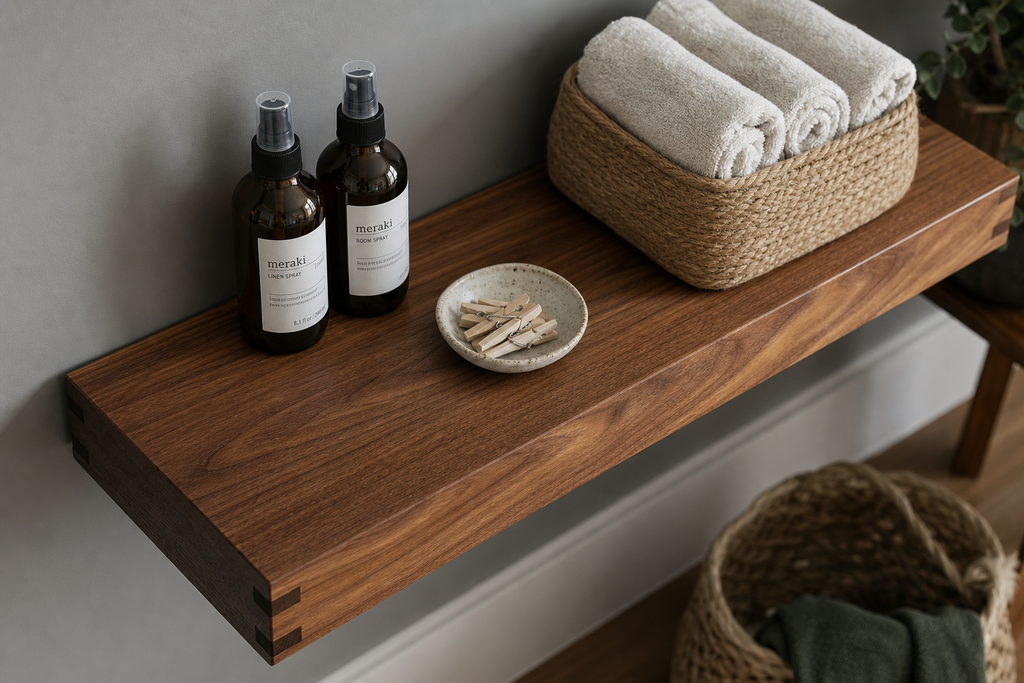
- For a Stained Wood Finish: Apply your choice of wood stain (such as Minwax Early American or Danish Oil). Once dry, seal the shelf with at least two coats of matte or satin water-based polycrylic or polyurethane.
- The Golden Rule: Always seal both the top AND underside of the floating shelf. Leaving the bottom unsealed allows uneven moisture absorption, which causes the wood to cup or twist.

- PROTECT WOOD SURFACES – Minwax Polycrylic Protective Finish protects and adds beauty to your interior wood projects, inc…
- CRYSTAL CLEAR FINISH THAT LASTS – The crystal clear finished offered in this protective coating is ideal for use over al…
- GLOSS SHEEN – Give your wood projects a sleek finish with this gloss clear varnish. It not only protects the natural bea…
DIY Floating Shelves vs. Modular Track Systems
If you live in a rental property or prefer adjustable shelving that grows with your needs, modular track systems are an excellent alternative to permanent wood builds.
| Feature | Custom DIY Wooden Floating Shelves | Modular Wall-Track System (e.g., Elfa / IKEA BOAXEL) |
|---|---|---|
| Weight Capacity | High (50–100+ lbs) when anchored into studs. | Very High (100–200+ lbs) evenly distributed across top track. |
| Adjustability | Fixed position once installed. | Fully adjustable; shelves can be reconfigured in seconds. |
| Rental Friendliness | Requires stud anchors and patch repair upon removal. | Mounts to a single top hang-track, minimizing wall holes. |
| Aesthetic Vibe | Warm, custom, built-in furniture feel. | Clean, modern, open wire/mesh functional utility. |
How to Declutter Your Home Room-by-Room (Without the Stress)
Common DIY Floating Shelves Mistakes to Avoid
- ⚠️ Relying on Drywall Anchors Alone: Never rely solely on plastic drywall anchors for shelves holding heavy liquid detergents. Always anchor the main ledger cleat into at least two solid wood wall studs.
- ⚠️ Skipping Edge Banding: Leaving raw plywood edges exposed allows moisture to enter the layers, causing plywood delamination.
- ⚠️ Forgetting Appliance Clearance: Measuring machine height without checking how high top-loader lids open or how far front-loader doors swing outward.
- ⚠️ Sealing Only the Top Surface: Sealing only the visible top face of the shelf creates uneven tension as humidity changes, causing the shelf to bow upward over time.
Frequently Asked Questions About DIY Floating Shelves
1. How much weight can a DIY floating shelf hold?
When built with a solid internal frame and anchored into two wall studs using 3-inch screws, a DIY floating shelf can easily support 50 to 100+ pounds, making it strong enough for heavy detergent jugs, iron bases, and stacks of towels.
2. Can I build floating shelves without a pocket-hole jig?
Yes. You can build a heavy-duty floating shelf by mounting a sturdy 1.5-inch thick wood slab (such as a butcher block or solid 2×12 board) directly onto heavy-duty steel floating shelf brackets that screw into wall studs.
3. What is the best wood for DIY laundry room shelves?
Hardwoods like maple, oak, and birch offer superior strength and moisture resistance. For budget builds, high-grade birch or maple plywood with solid wood edge banding provides excellent stability without warping.
4. How deep should floating shelves be above a washer and dryer?
Keep upper shelves between 12 and 15 inches deep. This keeps supplies easily accessible while ensuring you won’t bump your head when reaching down into a washer drum or folding clothes.
5. How do I make floating shelves look seamless against uneven walls?
Drywall is rarely perfectly flat. After mounting your shelf, apply a thin bead of paintable acrylic latex caulk along the gap between the shelf edge and the wall, then paint over it for a clean, built-in look.
Conclusion & Final Takeaway
Building DIY floating shelves is one of the most rewarding small-space upgrades you can make. By anchoring a solid ledger frame into wall studs and sealing the wood against humidity, you transform empty wall space into strong, functional storage that keeps your counters and floors clutter-free.