How to Organize Deep Kitchen Cabinets Without Losing Items in the Back
💡 Affiliate Disclosure: PetchCrea is reader-supported. When you buy through links on our site, we may earn an affiliate commission at no additional cost to you. As an Amazon Associate, I earn from qualifying purchases. We only recommend products that genuinely help you optimize and organize your space.
Deep kitchen cabinets sound like a luxury until you actually have to use them. In small apartments and compact homes, deep shelving frequently turns into a black hole: canned goods expire out of sight, pots get shoved out of reach, and retrieving a blender means crouching down and emptying half the cabinet onto the floor.
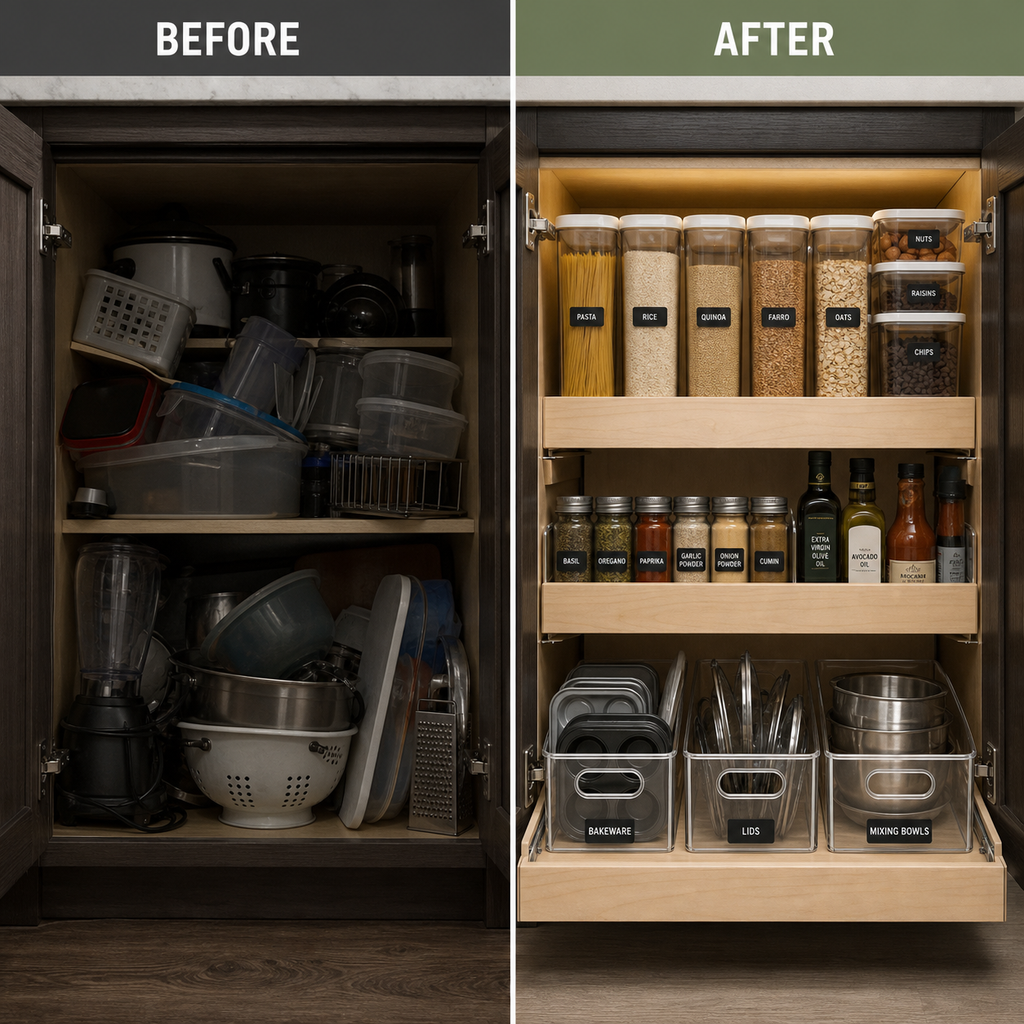
The secret to knowing how to organize deep kitchen cabinets isn’t cramming more inside; it is creating linear access. When you convert fixed shelves into sliding compartments and organize items by frequency of use from front to back, deep storage transforms into functional square footage.
The Quick Fix: How to Stop Losing Items in Deep Shelves
If you need a functional setup immediately, follow this baseline strategy before buying any bins:
- Clear and measure the full depth: Standard base cabinets measure 24 inches deep, while deep upper cabinets usually measure 12 to 14 inches. Measure width, clear shelf depth, and the door clearance space when hinges are open.
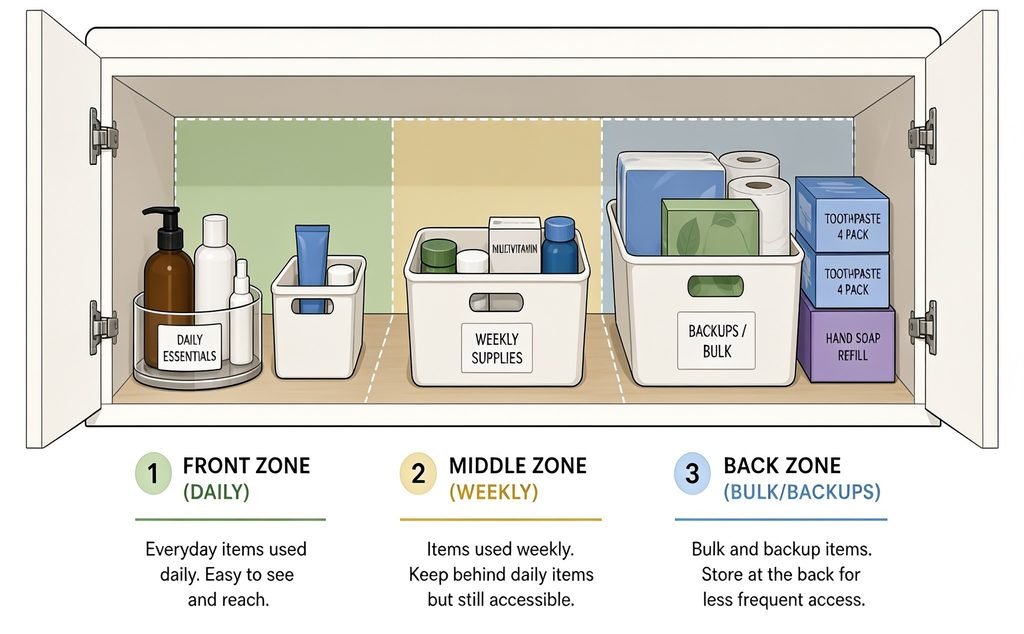
- Implement front-to-back zoning: Group items into three distinct rows: daily essentials in the front third, weekly supplies in the middle, and backup bulk goods in the rear.
- Turn deep shelves into pseudo-drawers: Use long, straight-sided storage bins or no-drill pull-out wire baskets that pull completely out onto the counter, letting you access the rear without kneeling.
- Elevate vertical clearance: Add expandable shelf risers across the back half of upper shelves to create a stadium effect, ensuring rear labels remain visible over front items.
Why Deep Cabinets Become Cluttered “Black Holes”
Deep kitchen cabinets fail because of human sightlines and physical reach. Most humans naturally scan what is directly at eye level and within arm’s reach (about 14 to 18 inches). When a shelf extends 24 inches back, anything behind the first row falls outside your field of view.
When items are invisible, two problems happen: you purchase duplicates of ingredients you already own, and the physical effort required to dig things out causes the shelf to collapse into disorder within days. The fix requires converting static horizontal space into modular, pullable storage channels.
The 4-Step System for Organizing Deep Cabinets
Step 1: Empty and Measure the Usable Footprint
Do not start by organizing items inside the dark cabinet. Pull everything out onto your counters or kitchen table. Group items into immediate duplicates, everyday tools, and seasonal gear.
Before purchasing any organization bin, measure three critical numbers:
- True depth: Measure from the back wall to the front shelf lip, subtracting 1 inch to clear the door when closed.
- Hinge clearance: Note whether cabinet door hinges protrude into the opening. Hinges can shave 1 to 2 inches off the usable width for sliding trays.
- Vertical clearance: Measure the height between fixed shelves to ensure your tall bottles or stacked organizers can slide freely.
Step 2: Establish Front-to-Back Access Zones
Organizing deep shelves requires thinking in layers rather than stacks:
- The Front Zone (First 8 inches): Reserve this prime space for items accessed daily—olive oil, salt, primary cutting boards, or everyday dinner bowls.
- The Middle Zone (8 to 16 inches): Place items used once or twice a week, such as baking staples, secondary spices, or your hand mixer.
- The Back Zone (16 to 24 inches): Store long-term reserves, such as backup pantry cartons, seasonal cookie cutters, or appliances used a few times a year.
Step 3: Implement Pull-and-Slide Units
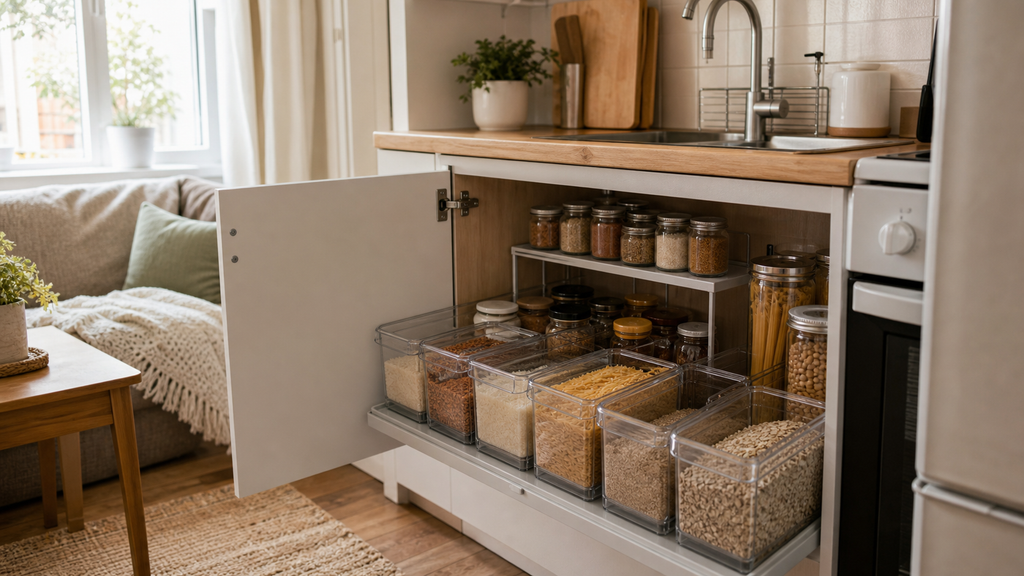
To reach the back of deep cabinets without crawling on the floor, your items must move toward you. Instead of leaving small bottles loose on a deep shelf, place them inside deep bins that match the cabinet’s full length. When you pull the bin handle forward, the entire back row travels out into plain view.
Step 4: Add Lighting to Eliminate Shadows
Deep cabinets are inherently dark, especially lower base units. Place a peel-and-stick, battery-operated motion sensor light on the interior ceiling or upper sidewall of the cabinet. Illuminating the rear immediately removes visual blind spots.
Specific Strategies: Lower Base vs. Deep Upper Cabinets
Not all deep cabinets serve the same purpose. Base cabinets demand different solutions than deep overhead storage.
How to Organize Deep Lower Kitchen Cabinets
Lower cabinets present an ergonomics problem because reaching them requires crouching.
- For pots, pans, and lids: Install a free-standing horizontal or vertical pan rack. Avoid nesting heavy pans inside one another, which discourages you from using the ones at the bottom.
- For small appliances: Keep large, heavy mixers or blenders on heavy-duty sliding trays so you can pull them forward with one hand rather than straining your back.
- For pantry staples: Use long, narrow rollout organizers configured like pull-out pantry drawers.
Deep Upper Cabinet Organization Hacks
Deep upper cabinets (often found above refrigerators or in older kitchen designs) make items hard to see and dangerous to reach.
- Use high-sided, clear bins with bottom-front handles: This lets you grab the bin securely from below, lower it to counter height, grab what you need, and slide it back.
- Avoid heavy glass: Use lightweight acrylic or plastic containers on upper shelves to keep lifting safe.
- Use step risers for cans: Tiered risers keep the back row elevated, preventing cans from vanishing behind one another.
Organizing Deep Corner Cabinets (Blind Corners)
Deep corner cabinets, sometimes called blind base cabinets, are notoriously awkward because half the space extends sideways behind a wall.
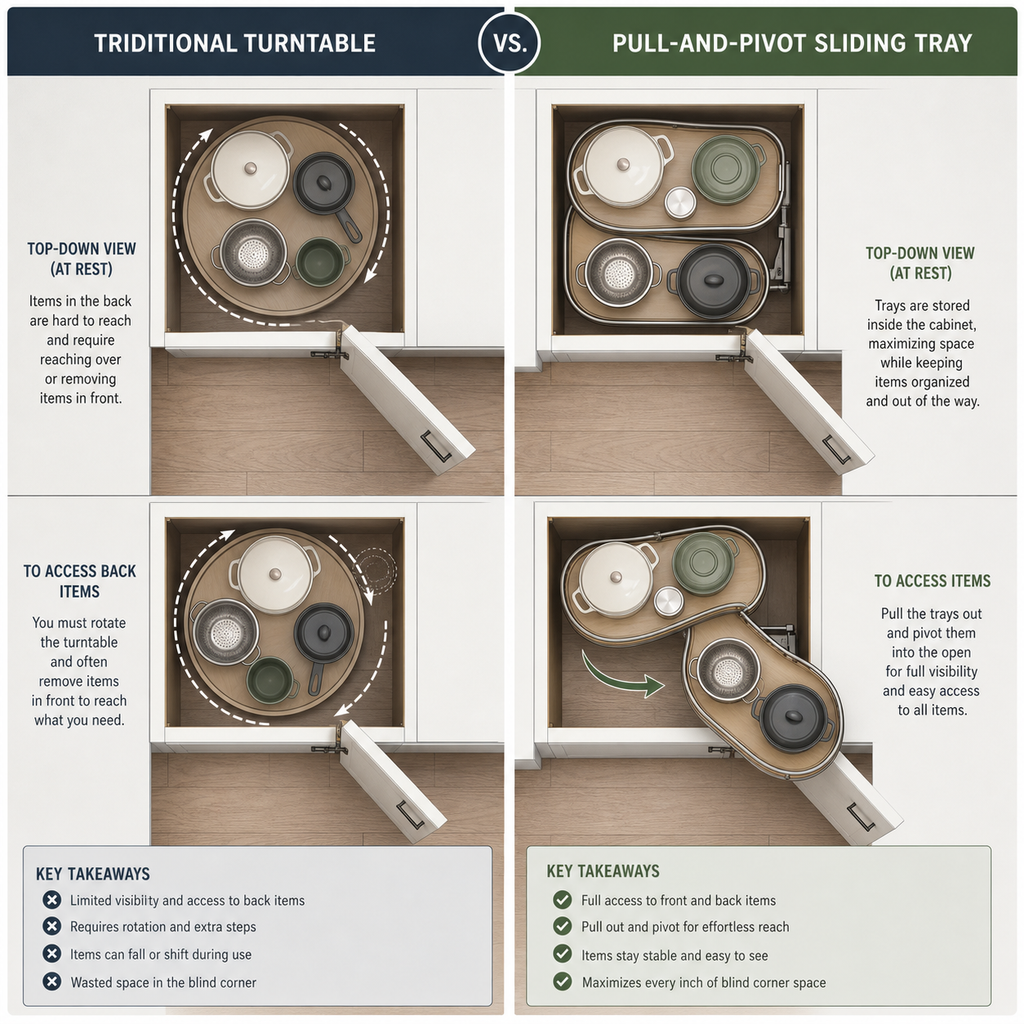
To handle a blind corner without custom carpentry:
- The Heavy-Duty Turntable Method: Place a large 18-to-20-inch turntable in the center of the blind space. While it leaves small corners vacant, it brings every stored item straight to the opening with a flick of the finger.
- The Modular Bin System: Store low-frequency items (holiday platters or paper goods) in a labeled bin inside the far hidden corner. In front of it, place a daily-use pull-out basket. To get to the back, slide the front basket out onto the counter, grab the back bin, and return the front basket.
Practical Comparison: Choosing the Right Organizer for Deep Cabinets
| Storage Solution | Best For | Main Benefit | Potential Limitation |
|---|---|---|---|
| No-Drill Pull-Out Sliding Drawers | Lower cabinets, pots, pans, heavy small appliances | Brings items completely out on smooth metal tracks | Requires careful measurement of hinge clearance |
| Deep Acrylic Bins (20–24 inch lengths) | Lower pantry cabinets, packaged snacks, cleaning supplies | Acts as a removable drawer; keeps loose items grouped | Must be lifted out if you need an item at the very back |
| Two-Tier Turntables (Lazy Susans) | Deep corner cabinets, sauces, oils, spices | 360-degree rotation brings items from rear to front | Leaves unused corner space on square shelves |
| Tiered Expandable Shelf Risers | Upper deep cabinets, canned food, small jars | Creates stadium seating so all rear labels remain visible | Does not increase shelf depth; requires sufficient vertical clearance |
Common Deep Cabinet Mistakes to Avoid
- Buying 10-inch bins for 24-inch shelves: Most generic pantry bins are designed for shallow 12-inch shelves. Putting standard bins into a 24-inch cabinet leaves a foot of wasted, empty space behind them—or worse, a spot where lost items gather dust.
- Stacking items without vertical dividers: Piling frying pans or baking sheets directly on top of each other forces you to unstack four items to get to one. Use vertical file-style racks instead.
- Ignoring the door clearance: Organizers that sit flush with the outer edge can prevent cabinet doors from closing properly or get scratched by cabinet catches.
- Failing to label the front of deep bins: Even clear bins can distort labels when slid into dim shelves. A simple front label tells every household member exactly where items belong.
Our honest Product Recommendation
1. No-Drill Adhesive Slide-Out Wire Baskets
- Problem it solves: Fixes the low-visibility issue in deep lower cabinets without requiring power tools or damaging rented cabinetry.
- Who it is suitable for: Apartment renters and homeowners with standard 21-to-24-inch lower cabinets.
- Key feature to look for: Industrial-grade adhesive strips paired with heavy-duty ball-bearing slide rails, ensuring smooth movement even when loaded with heavy cans.
- Limitation: Weight capacities are typically lower than screw-mounted hardware; keep total contents under the manufacturer’s stated limit.

- Dual Size Versatile Storage: Gurwen 2-pack kitchen cabinet door organizer set includes a large basket (8.66″ x 3.54″ x 5…
- Strong Hold Without Drilling: Each basket supports up to 8.8 lbs with heavy-duty adhesive strips. No tools, no screws—ju…
- Sturdy Rustproof Matte Black Carbon Steel: Crafted from heavy-duty thick carbon steel finished with a matte black waterp…
2. Deep Acrylic Storage Bins (21-Inch Length)
- Problem it solves: Groups loose pantry packets, condiments, and dry goods into manageable, pullable rows.
- Who it is suitable for: Anyone needing simple, modular organization on deep, fixed shelves.
- Key feature to look for: Straight vertical side walls (tapered bins waste up to 15% of shelf volume) and built-in ergonomic front handles.
- Limitation: Plastic can bow if loaded with heavy canned liquids; reserve for boxed goods, snacks, or lighter supplies.
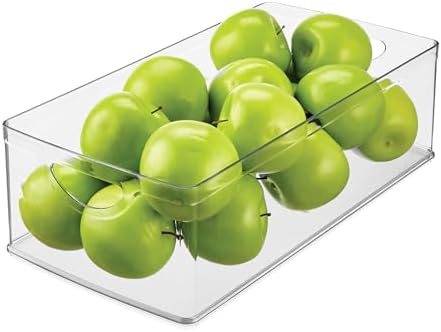
- EXTRA-LONG – This iDesign Extra-Long Storage Bin offers ample space for organizing oversized items like water bottles, b…
- CLEAR AND STACKABLE – Clear plastic construction provides visibility, and built-in handles make carrying effortless; Sta…
- VERSATILE – This clear plastic storage bin is perfect for organizing bathroom toiletries, cleaning supplies, laundry roo…
3. Large Rimmed Turntables (14–18 Inch Diameter)
- Problem it solves: Eliminates dead corners in blind base cabinets and deep overhead shelves.
- Who it is suitable for: Anyone storing bottles of oils, vinegars, sauces, or spice jars.
- Key feature to look for: A raised rim (at least 1.5 inches high) to stop tall bottles from toppling off when spun, along with a non-skid rubberized base.
- Limitation: Circular geometry leaves the four exterior corners of the shelf unused.

- 【NATURAL MATERIAL】Lazy susan organizer is made of natural bamboo, lightweight and strong without odor, easy to clean, an…
- 【360 DEGREE ROTATING】 Designed for smooth 360-degree rotation for easy access from any seat at the table. With just a si…
- 【EASY TO REACH】Open design keeps items visible and easily accessible, and the taller lip (height 2″) keeps things from f…
FAQ
How do I reach items in deep upper kitchen cabinets safely?
Use long, narrow clear bins fitted with integrated front-lip handles. Instead of reaching blindly into the shelf, pull the handle to slide the entire bin down to counter level. Store lightweight items (paper napkins, chips, baking powders) on high shelves rather than heavy glass jars or cast iron.
Can I install pull-out drawers in deep cabinets without drilling holes?
Yes. Modern slide-out organizers use heavy-duty commercial nano-adhesive tracks that bond securely to finished cabinet bases without screws. They support substantial weight and can be removed cleanly with warm air from a hairdryer when moving out.
What should you store in the deep back of kitchen cabinets?
Reserve the back 6 to 8 inches for low-frequency items: duplicate paper goods, seasonal holiday serveware, specialty baking pans, or appliances used only once or twice a year. Keep everything in that back zone stored inside labeled containers so you can retrieve them in one clean motion.
How do I organize pots and pans in deep lower cabinets?
Use a heavy-duty vertical pan organizer rack placed toward the front of the shelf so pans stand upright like files in a filing cabinet. This lets you pull any pan straight out without unstacking the others. Store baking sheets and cutting boards vertically along the cabinet sidewall using tension rods or divider inserts.